Jobs upload
⏰ Estimated reading time is 9 minutes.
Jobs upload allows you to upload a bunch of jobs from a CSV or XLSX file. If you are looking for automatic job creation, consider using API.
You can upload jobs, clients, and sites via jobs upload.
For the upload, you can use CSV or XLSX files formatted for Planado jobs upload standard. You can find examples of jobs upload files in the attachment to this solution.
Preparing an upload file
Use files attached to this instruction as examples for your uploads. Here we will describe some specifics regarding the preparation of XLSX and CSV upload files.
This is an example of a CSV upload file:

The first line of the file must contain column names:

Jobs upload file example
Columns description:
- External id — job unique id. You should use jobs' external ids when you are planning to upload the same file more than one time. External ids will prevent duplicates creation in this case. You can also use external ids to reference jobs via API.
- Template — a template that will be used to create a job.
- Type — job type.
- Scheduled at — date and time of a job.
- Scheduled duration — duration of a job in hours and minutes.
- Description — job description.
- Address — job address.
- Address description — if you need to specify some information about a job address, you can put it in the address description field.
- Entrance no — job address entrance number.
- Floor — job address floor.
- Apartment — job address apartment number.
- Contact 1 — job first contact name.
- Contact 1 phone — job first contact phone number.
- Contact 2 — job second contact name.
- Contact 2 phone — job second contact phone number.
- Skills — skills required for the job.
- Territory — a territory of the job.
- Assignee email — worker email that they use for login to the Planado mobile app.
- Assignee first name — the first name of the worker assigned to a job
- Assignee last name — last name of the worker assigned to a job
- Client external id — client's unique id, you can use it when you need to upload a job for an existing in your Planado domain client. Also can be used to update clients viaclients CSV-upload.
- Organization name — a name of a client organization, should not be used when a client is an individual.
- Client first name — the first name of a client, should be used when a client is an individual, should not be used when a client is an organization.
- Client last name — the last name of a client, should be used when a client is an individual, should not be used when a client is an organization.
- Client address — it will be used as a job address if the Address and the Site address fields were left empty.
- Client address description — if you need to specify information about a client address, you can place it here.
- Client address entrance no — entrance number of a client address.
- Client address floor — floor of a client address.
- Client address apartment — apartment number of a client address.
- Client contact 1 — the name of the first client contact.
- Client contact 1 phone — a phone number of the first client contact.
- Client contact 2 — the name of the second client contact.
- Client contact 2 phone — a phone number of the second client contact.
- Site name — the name of a job site.
- Site address — it will be used as a job address if the Address field was left empty.
- Site address description — if you need to specify information about a site address, you can place it here.
- Site address entrance no — entrance number of a site address.
- Site address floor — floor of a site address.
- Site address apartment — apartment number of a site address.
- Site contact 1 — the name of the first site contact.
- Site contact 1 phone — a phone number of the first site contact.
- Site contact 2 — the name of the second site contact.
- Site contact 2 phone — a phone number of the second site contact.
How to upload jobs
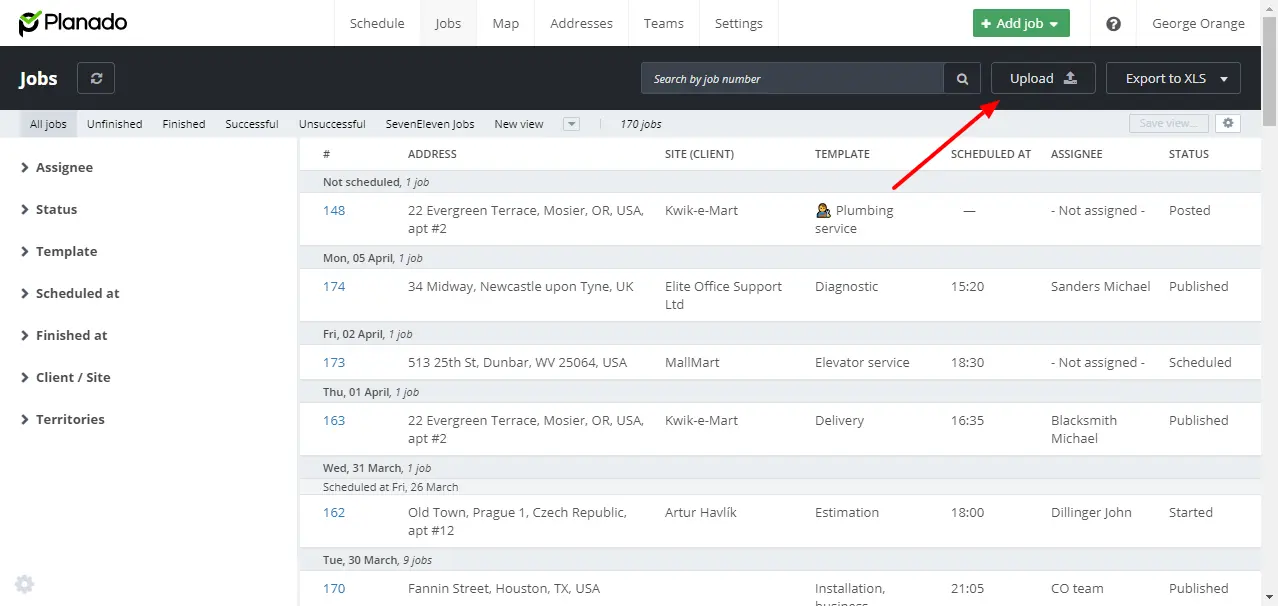
Go to the Jobs page and press the Upload button.
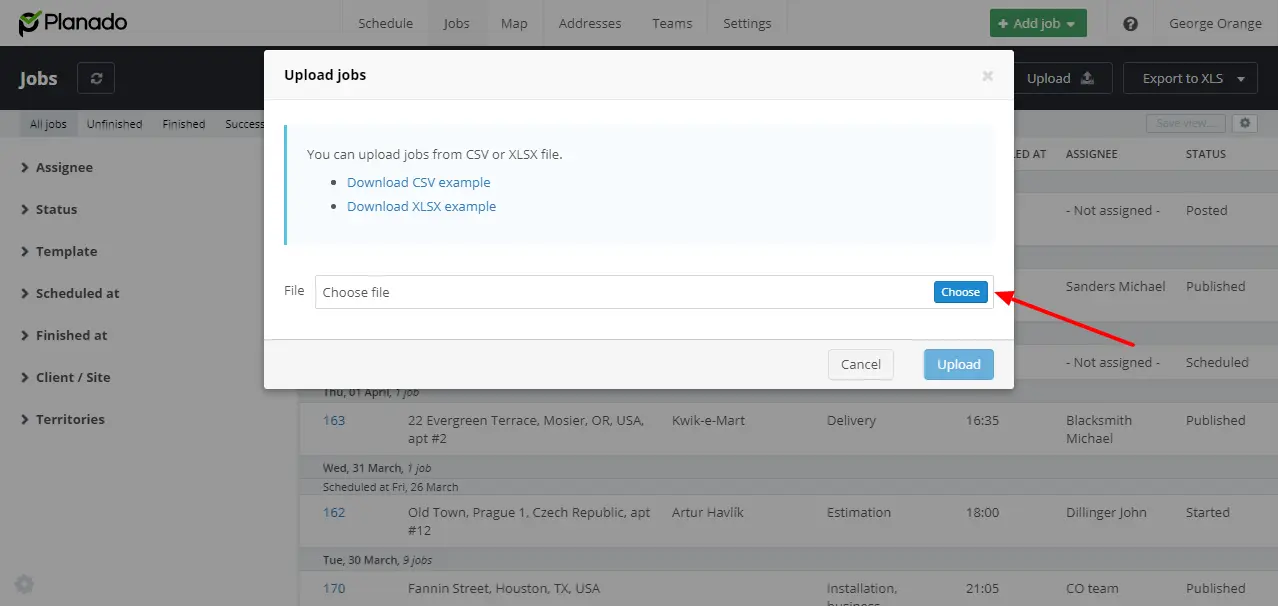
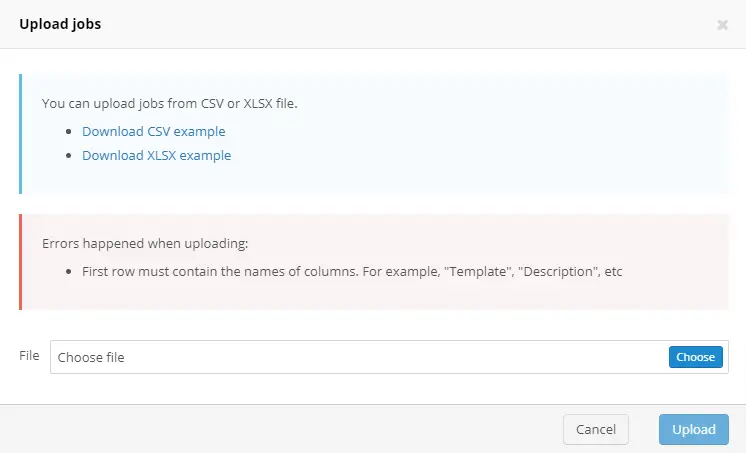
The jobs upload window will be opened. Press Choose, select your upload file, and press Upload. Jobs upload will begin.
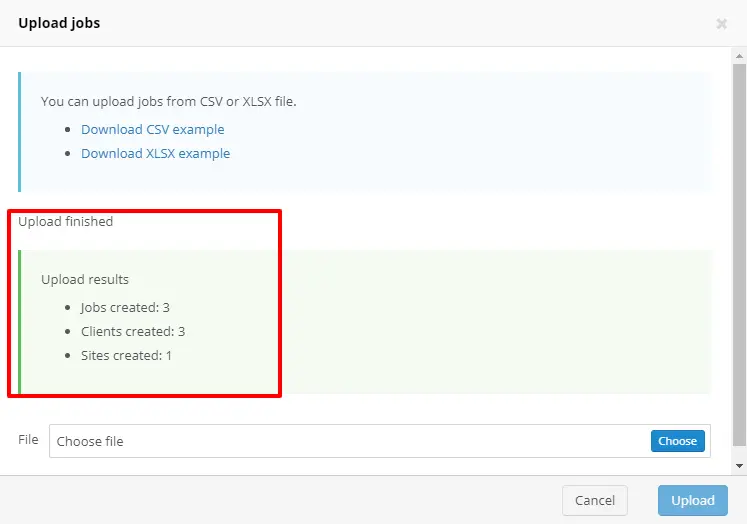
After jobs were uploaded, you will see upload results.
In this example there were uploaded 3 jobs, 3 clients, and 1 site:
You can find uploaded jobs on the Jobs page or in the Schedule, clients can be found on the Addresses → Clients page and sites are on the Addresses → Sites page.
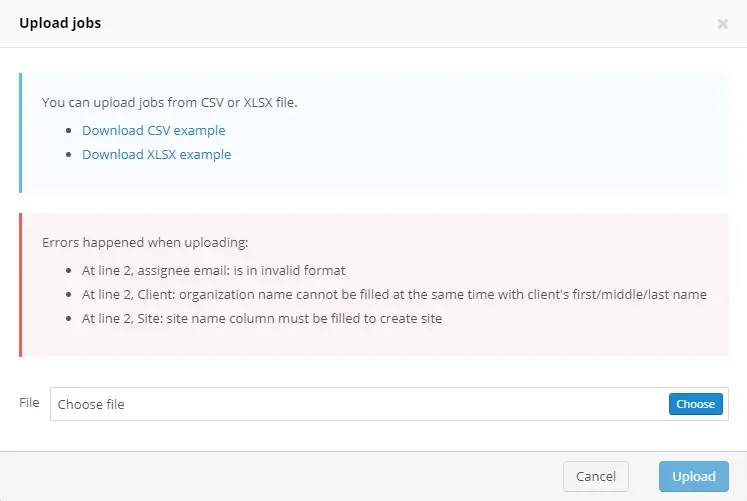
If there were some errors in the upload file, you will receive an error message:
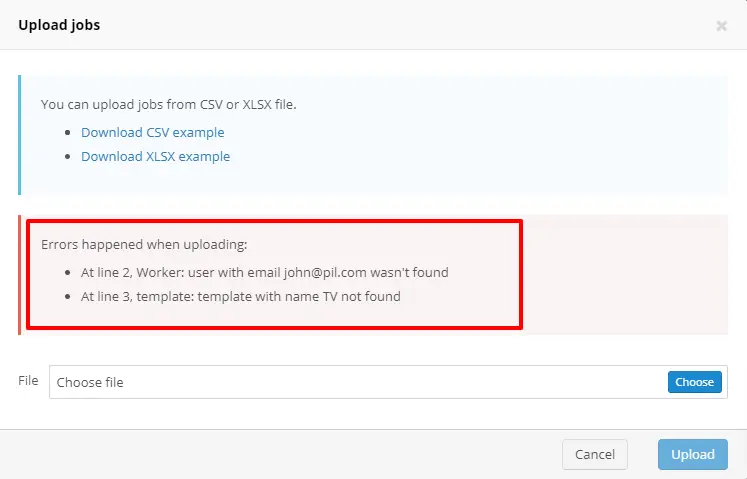
Correct the error in your file and try to upload the file again. If you cannot find a reason why your file is not uploading, send us this file via the support portal or in an email to support@planado.app.
Possible uploading problems
CSV file uses the wrong separator.
For the CSV file upload, Planado uses semicolons as separators. If you use a different separator, you will receive an error
message:
A semicolon is used inside one of the fields of the CSV file
If one of the file fields contains a semicolon inside of it, it should be separated with apostrophes. In other cases, you will receive an error message:
XLSX file has fields with types different from Text
When uploading jobs via the XLSX file, all of its fields should have the Text type. Otherwise, you will receive an error message:
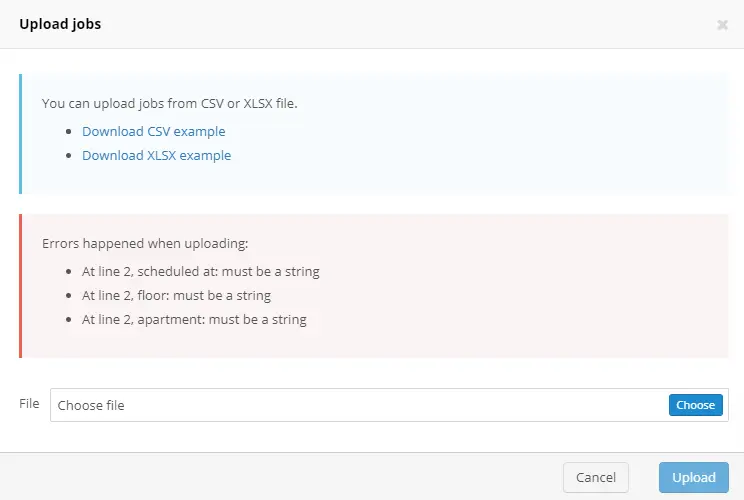
Usually, it happens with Scheduled at, Scheduled duration, Entrance no, Floor, and Apartment fields because Excel and other tables editing software interpret their content as numbers or dates.
Upload examples
We will go through a few examples of jobs upload adding new columns to the table with each upload.
You can find example files in the attachment to this instruction.
1. Uploading a job without a client
Let's look at the upload with information only about a job.
For this one, we will not need client and site fields. so you can delete them from your file. If you are planning to upload clients or sites from the same file, you can leave these fields empty for now.
Note, that if you are using XLSX file ощиы upload, you cannot leave empty columns in the file.

⚠️ If you are planning to use this file for further uploads, make sure that you fill the external id field.
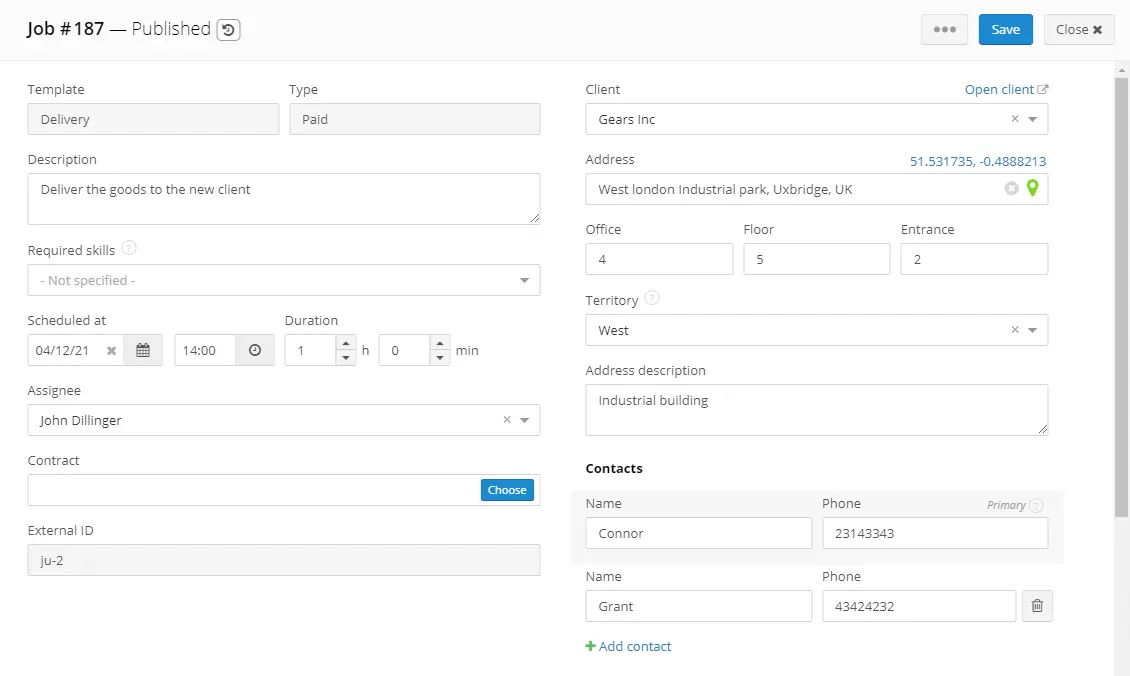
We have created a job with the "ju-1" external id. That means that in the future uploads of this file, jobs with this external id will not be created.
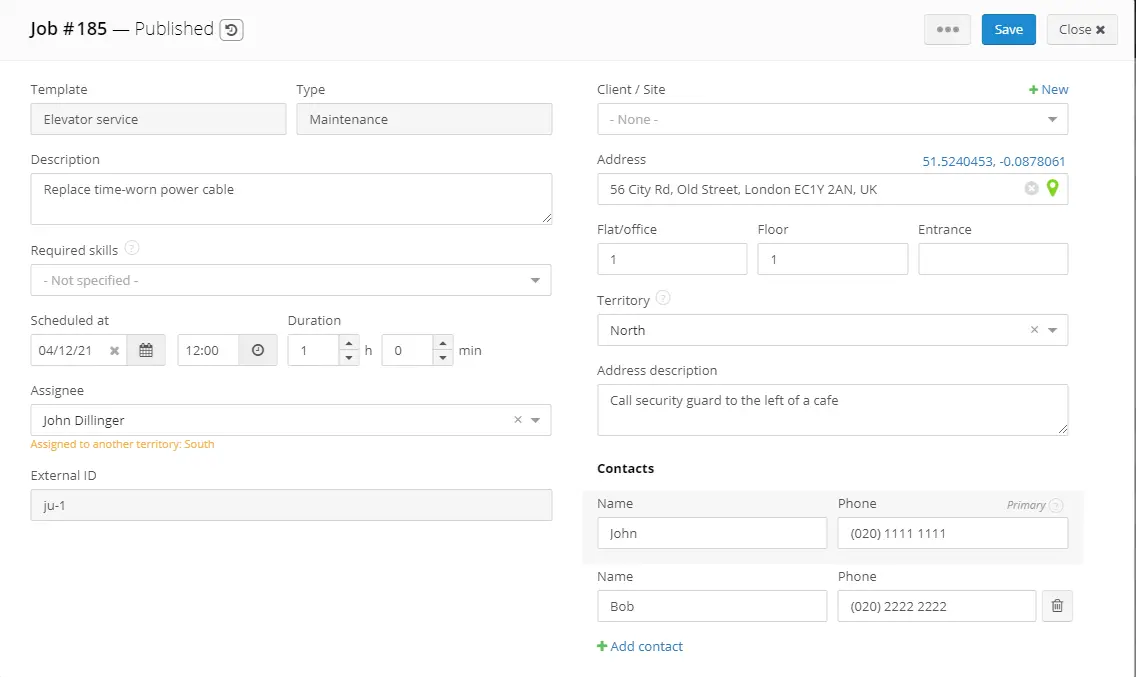
Job created from a job upload
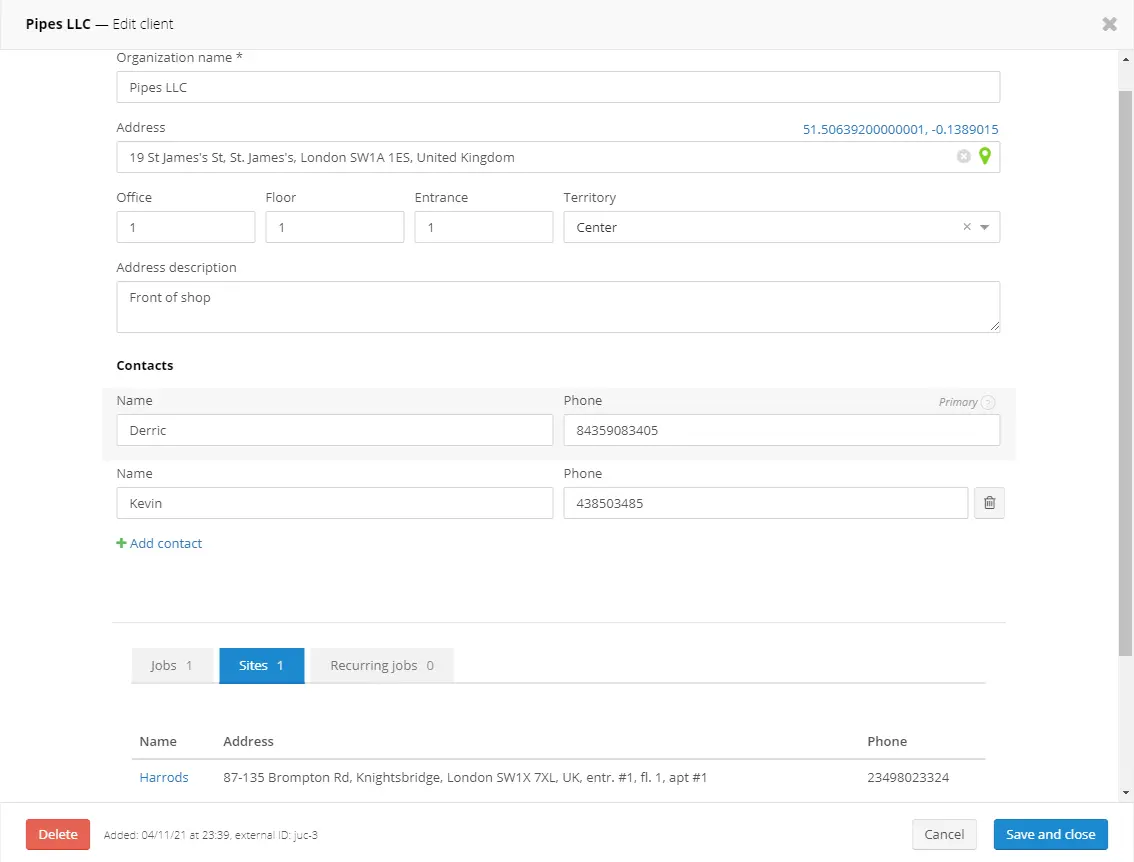
2. Uploading a client organization
To upload a client, we need to add client fields to the table.
First, we will look at the client organization and will not be adding client individual fields for now.
Let's add the following fields to the table:
- Client external id
- Organization name
- Client address
- Client address description
- Client floor
- Client office/apartment
- Client entrance no
- Client contact 1 name
- Client contact 1 phone
- Client contact 2 name
- Client contact 2 phone
- Client territory
As well as jobs, clients have external ids. You need to use client external ids to be able to link jobs to clients through jobs upload. You can also use them to edit clients through CSV upload.
Note, that if you want to use client's address as a job address the job Address field should be left empty.
If you are not planning to use some of the client's fields (like the client's second contact) you do not have to add them to the table.
This is how a job with a client upload table looks like:


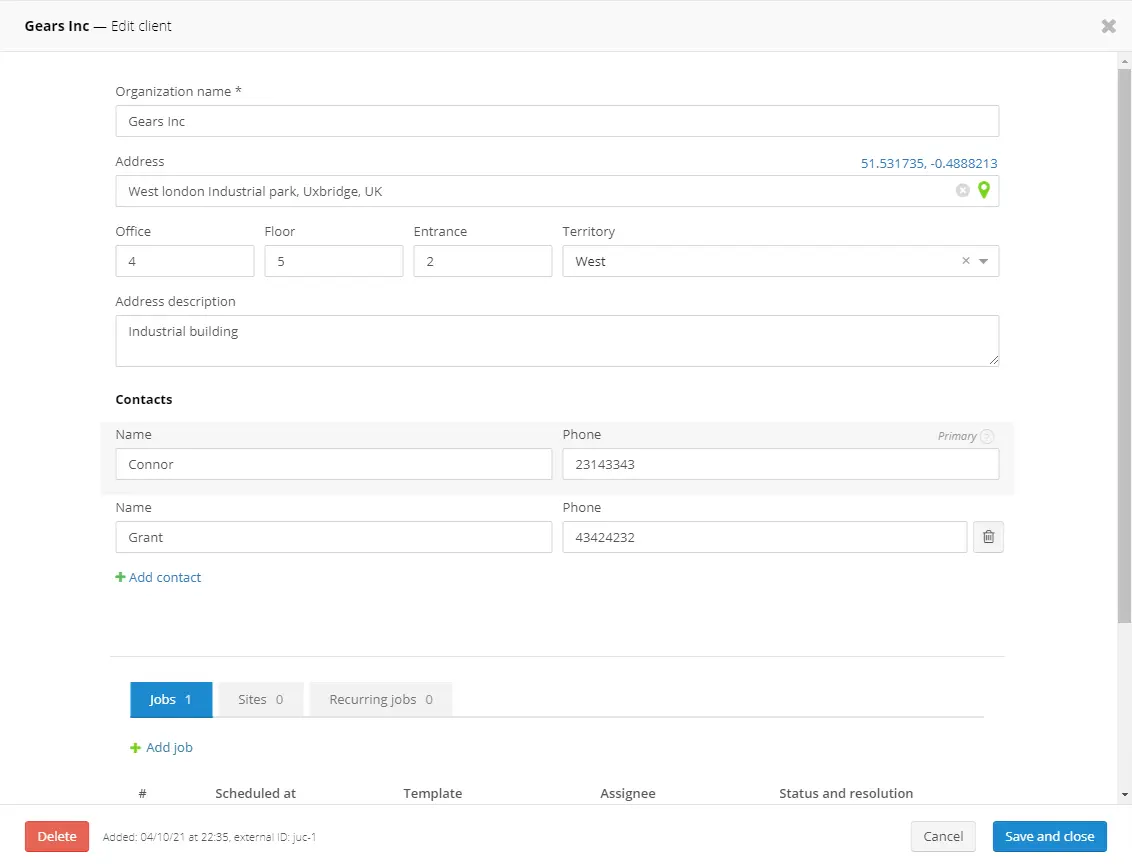
After the upload, a job and a client will be created. Note, that the job address and the job additional information (address description, office, floor, entrance number) are taken from the client's fields.
On the Addresses page, you can find the newly created client. In future examples, we are going to use this client for other jobs.
When using XLSX file upload, all of the fields should be filled. Because of that in the example files we are going to use only the second line for each upload.
3. Individual client upload
Let's add an individual. To do so we need to add the following fields to the table:
- Client first name
- Client middle name
- Client last name
The Organization field will be empty in this case.


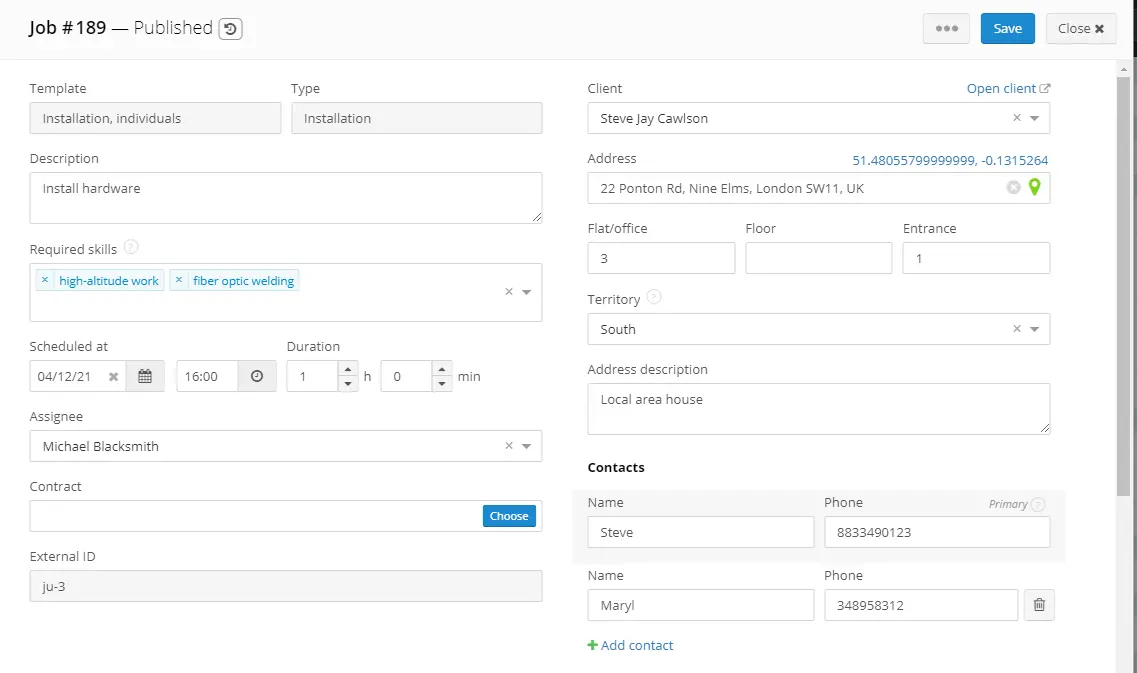
A job will be created from this upload:
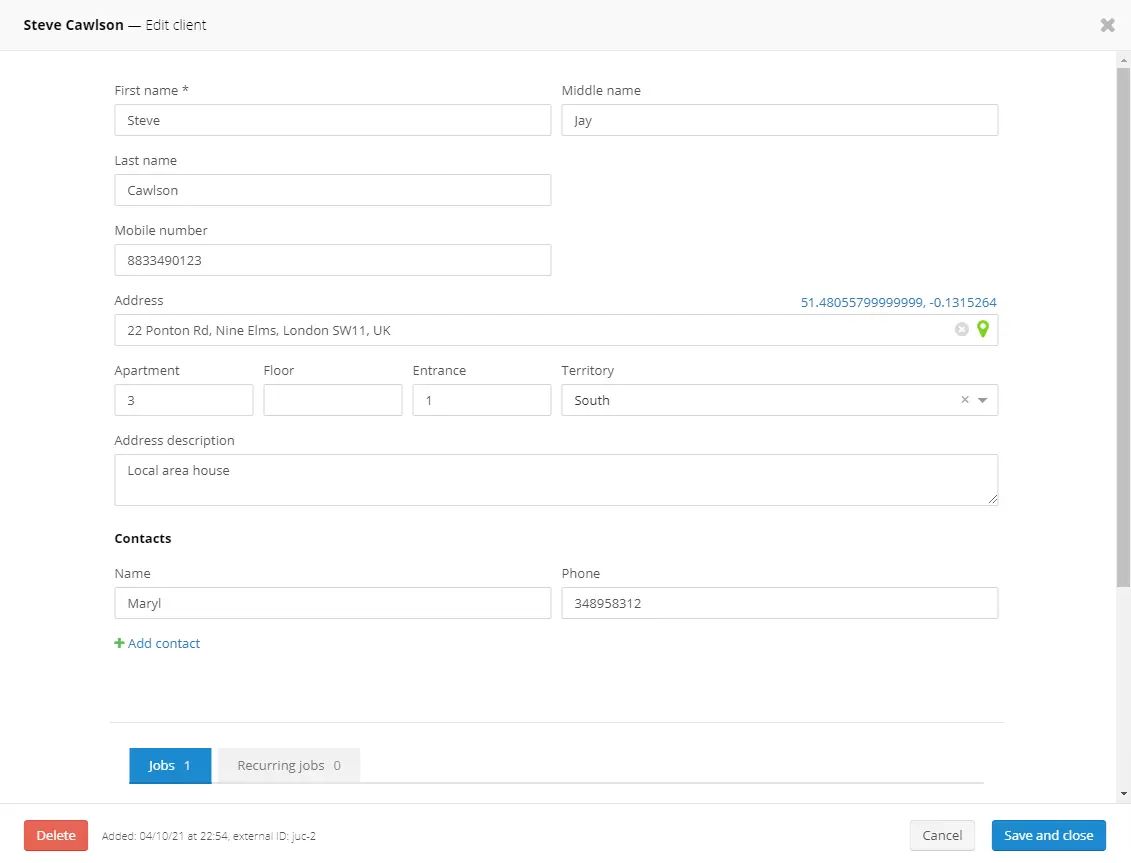
As well as the client:
4. Uploading a site to an existing organization
Let's look at the example where we add a site to an existing client. To do so we will need to add the following columns:
- Site external id
- Site name
- Site address
- Site address description
- Site entrance no
- Site floor
- Site office/apartment
- Site contact 1 name
- SIte contact 1 phone
- Site contact 2 name
- Site contact 2 phone
- Site territory
In this case, we already have the client, so we will not specify the client's address and will just put its external id and the name.
As well as a client, a site needs to have an external id. It will be used for future jobs upload to this site.


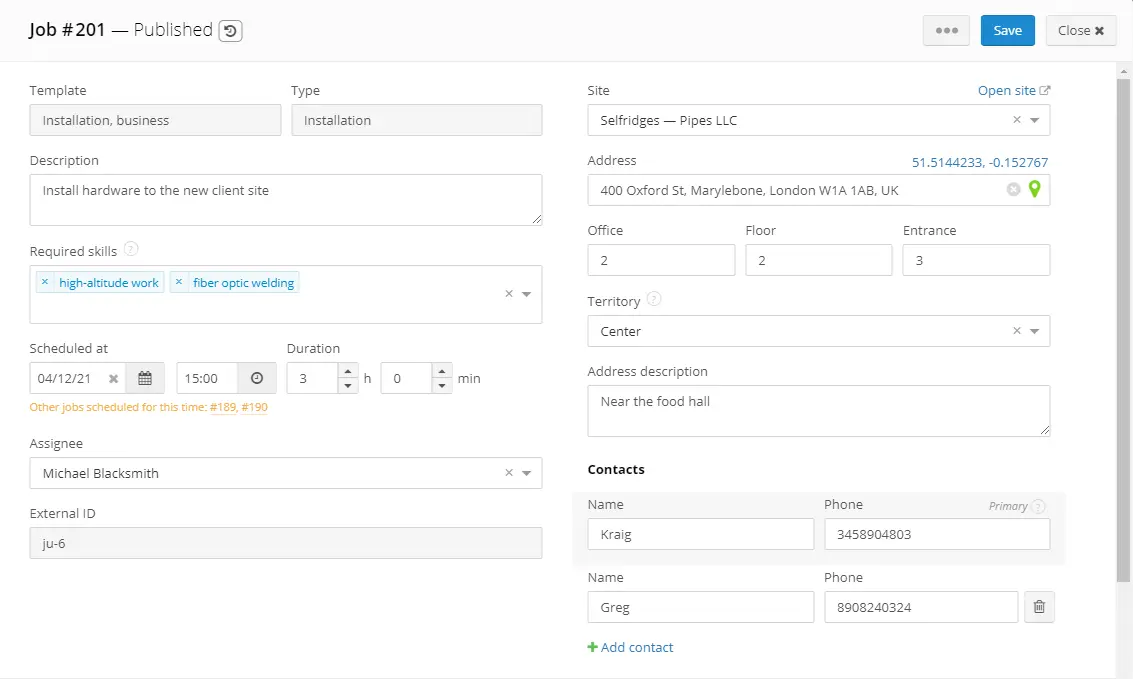
After the file was uploaded, a job will be created:
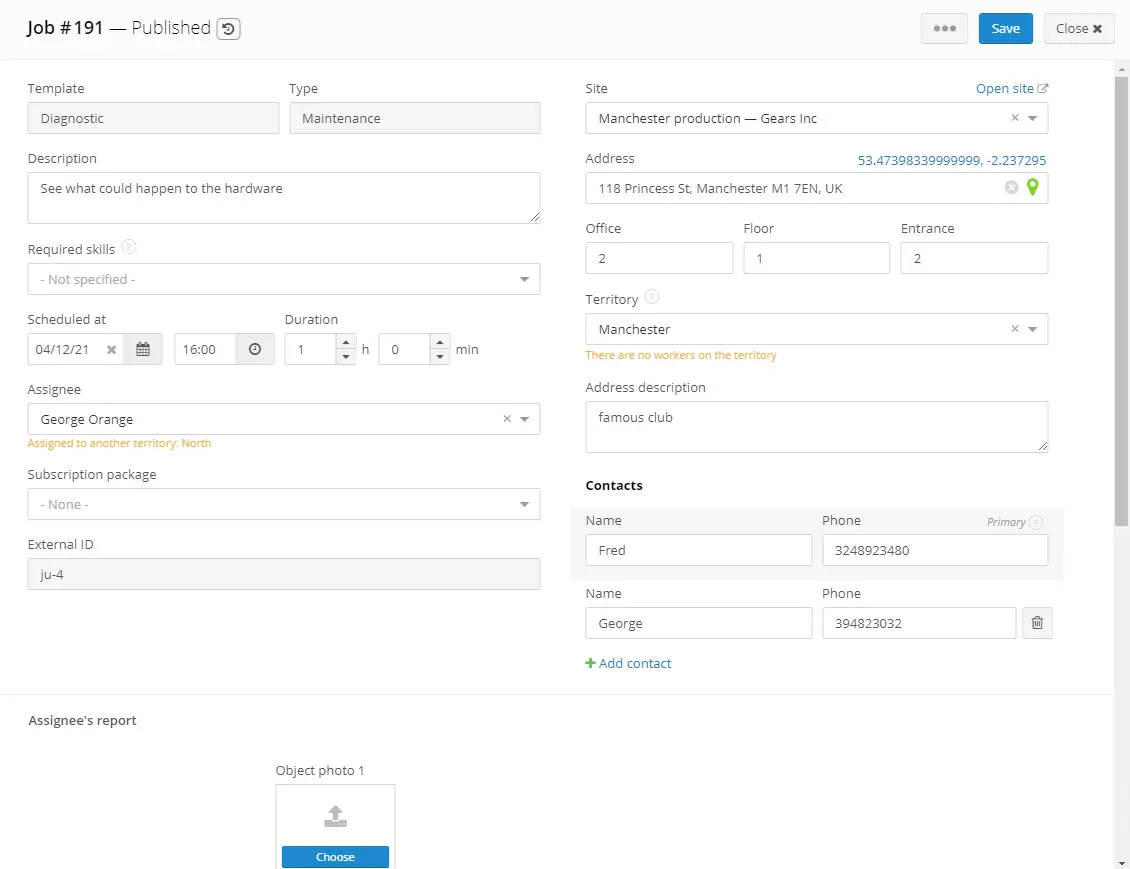
Alongside the job, the site will be created.
The job address in this case is the site address and it has the same contacts and address description as the site.
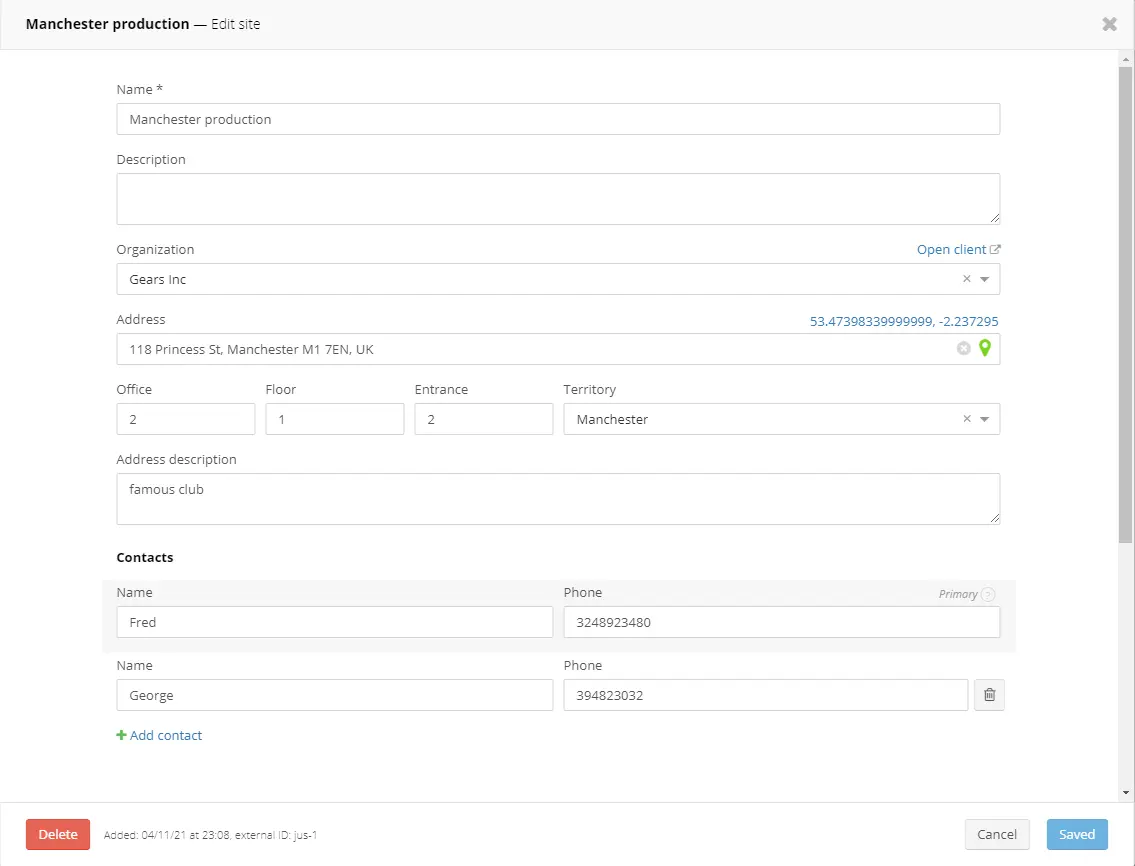
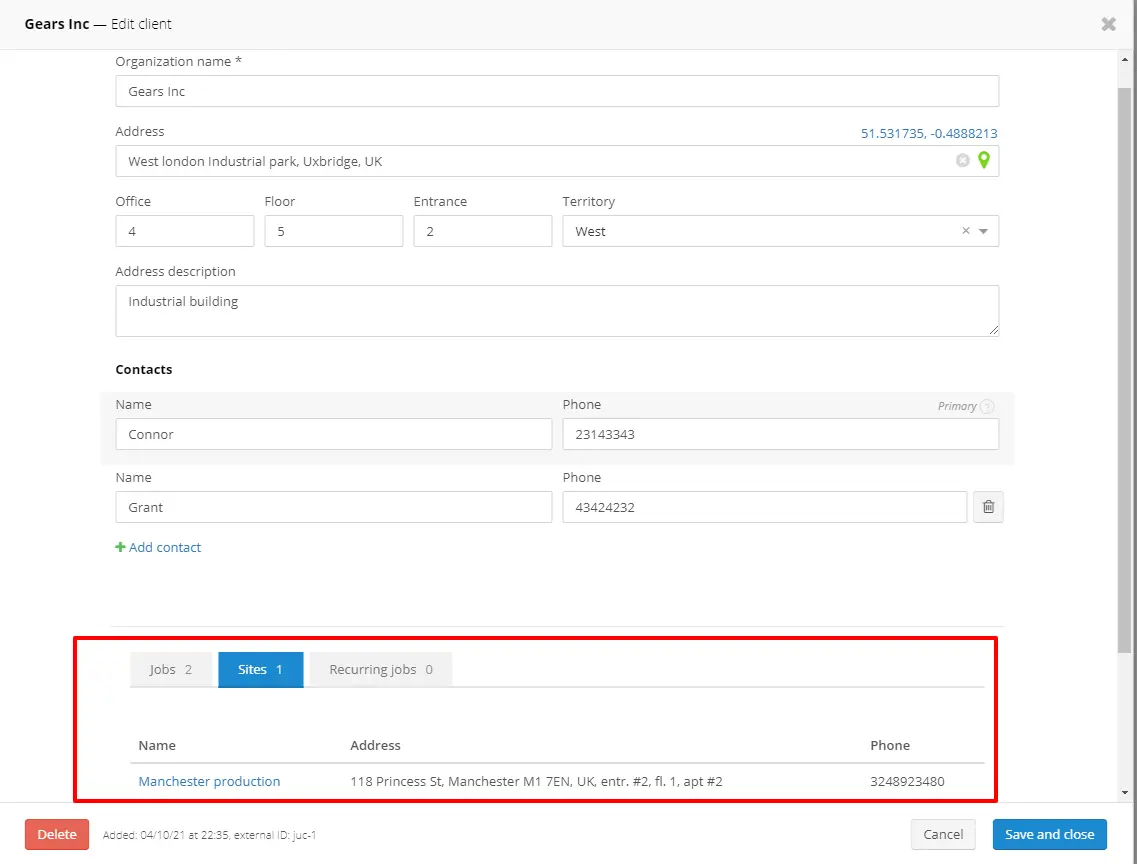
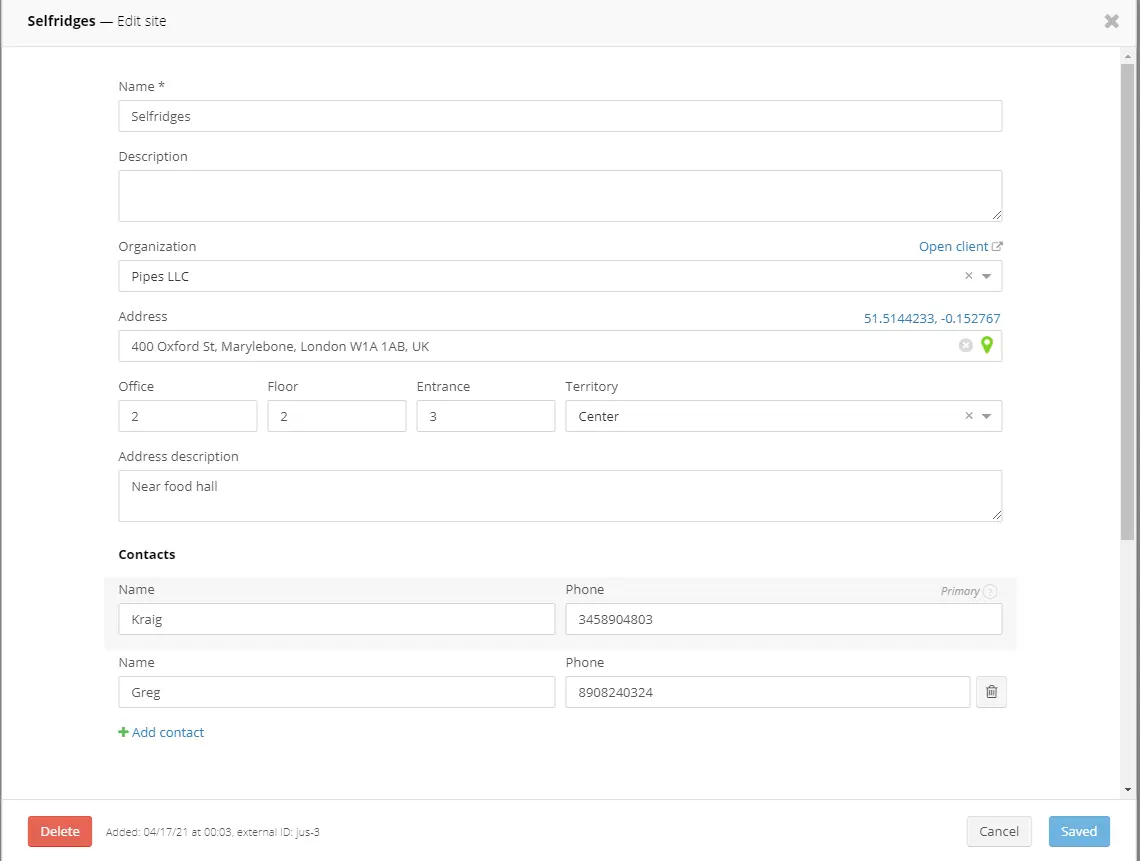
The site will be linked to the client that was set in the upload file. You can find the client's site if you open a client and switch to the Sites tab.
5. Job for a new organization's site upload
Let's add a job for a new client with a new site. Upload file, in this case, will look like this:


In this case, the job will have the same address, contacts, and other fields as the site.
The new site will be linked to the new client. You can find the site on the Sites tab in the client window.
The site has an Organization field with the linked client.

6. Job upload for the second site of an organization
In this example, we will add a site to an existing client. We are not specifying the client's address and other information because the client was already created. In this case, the client external id will be enough.


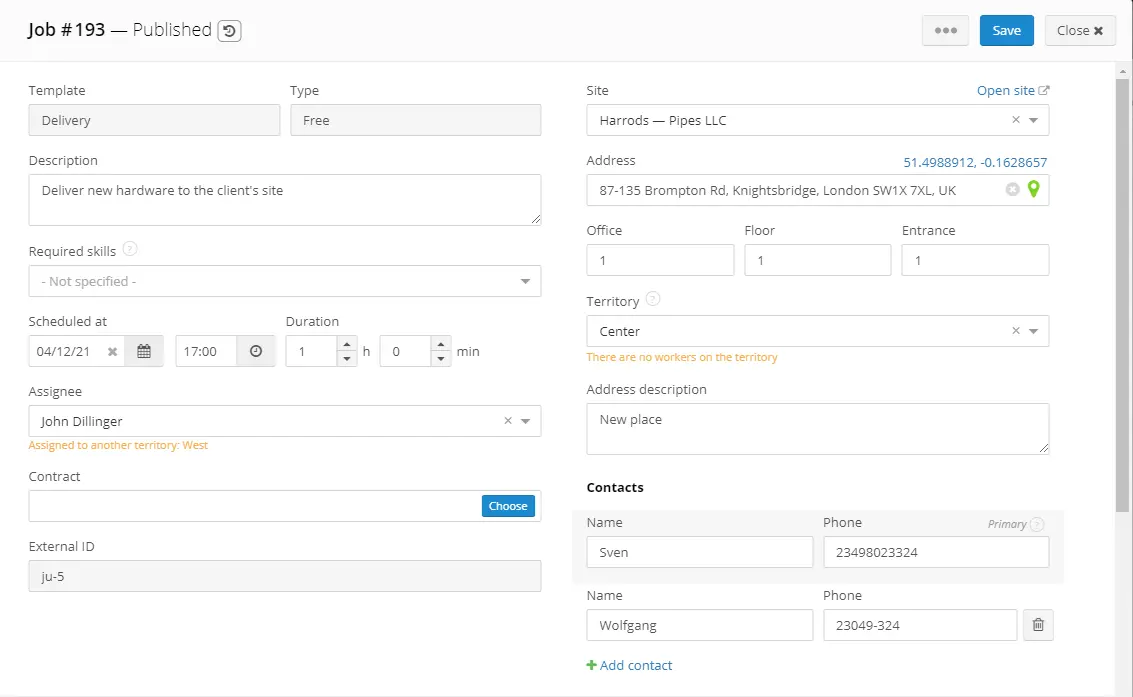
The job was created after the upload:
Because we were adding a site to an already existing client, this site will appear on this client's page.
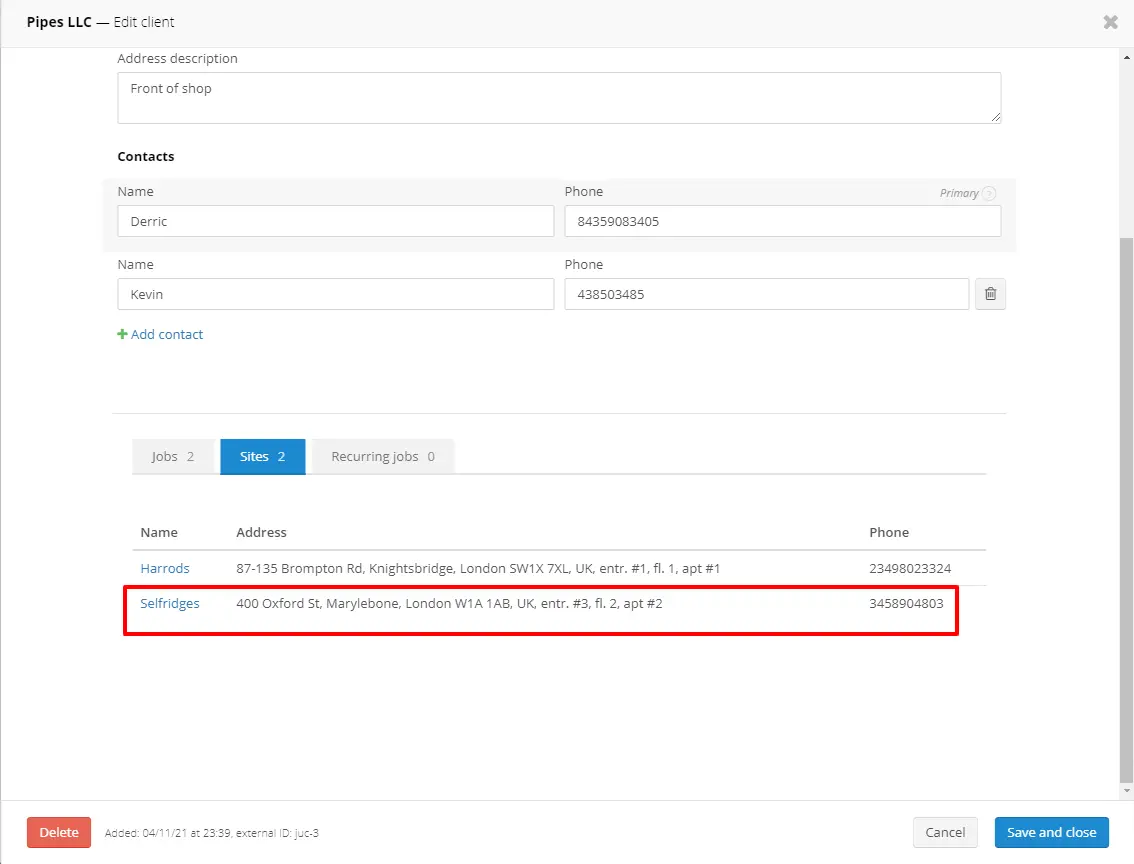
And this site will be used as a site for the newly created job.
You can add jobs to uploaded clients and sites from the Planado web app as well as uploading them.
If you have problems with jobs upload, send us your upload file to support@planado.app, we will help you to correct it.